If you have more than one DAP, you can use Dapper to Sync them both. By default this mode is turned off for Dapper.
Important: Only connect one DAP at a time when using Dapper.
First, lets reset Dapper:
To reset, hold down the option/alt key (and keep it held down until you're done):
- Hold down the Alt/Option key and launch Dapper
- When asked if you want to reset dapper, click Yes
- Now you can let go the option key.
Dapper will reset…. now onwards to enable multi DAP mode:
Enabling Multi DAP Mode
To enable, hold down the option/alt key (and keep it held down until you're done):
- Hold down the Alt/Option key and launch Dapper
- When asked if you want to reset dapper, click No
- When asked if you want Detailed Debugging turned on, Click No
- When asked if you want to use Multi Dap Mode, click Yes
- Now you can let go the option key.
Dapper will now fire up and go through the setup wizard - use it to set up your first DAP, but notice the warning dialog that tells you how to setup iTunes for the first DAP:
Notice that for the DAP I used first, Dapper is telling me to use a Playlist Folder in iTunes called “Dapper FiiO X7”
This is what it looks like in my iTunes (You will notice I also have an X1):

You can go through the standard setup and sync the first DAP.
Adding your second (or third, fourth, fifth) DAP:
Now, disconnect your first DAP… Make sure your Dapper configuration is unlocked by clicking the lock buttonto unlock your settings in Dapper:
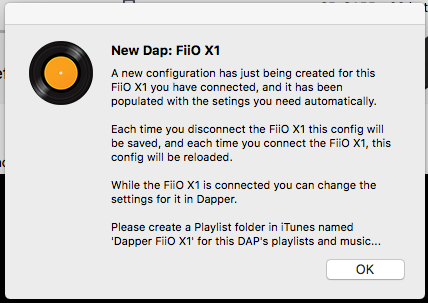
Now, plug in the second DAP and you will be told the name for your next iTunes folder:

Now, your Dapper screen will show the new DAP setup, but will show the first DAP's drives. You need to click the icon below the left (first) card to select the new DAP’s first drive and then click on the right card area to select a second card. If you dont have a second, click the space anyway and cancel the selection to let Dapper know there isnt a second card.
Now, use the slider for this DAP, lock the config and Sync!


