


To start fresh, hold down the Option Key while launching Dapper and answer “Yes” when asked if you want to reset settings.
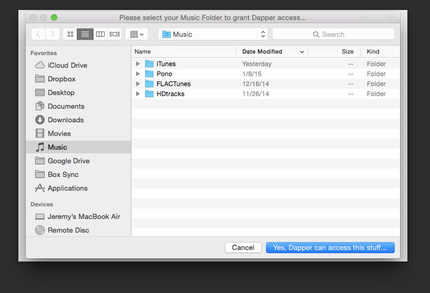
When Dapper first starts, the Wizard will ask you to select your Music Folder. This is the folder that contains your iTunes library, as shown in the example below. You will most likely simply need to click the “Yes, Dapper can access this stuff…” button.
This step actually tells OSX that your app is allowed to access those folders and files and is a security requirement of OSX.
Next, Dapper copies files and playlists from iTunes. It will copy any music that is contained in any playlist whose name begins with the word “Dapper”. By way of an example, the library below contains a few smart playlists with Dapper in their name. All the music in these playlists will be copied, and the playlists themselves will be copied too.

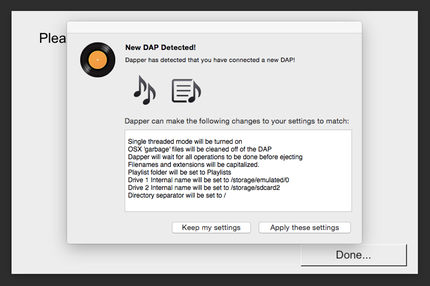
Next, Dapper can set up its configuration automatically to match your Digital Audio Player. During the setup Wizard you will be asked to connect your DAP.

The DAP must physically be plugged in while Dapper is running in order for it to be detected, and if it is, you will see a window as shown below asking if you want to set up the configuration to match your DAP:
If this dialog box does not get displayed, you can still manually select a DAP, as shown here.
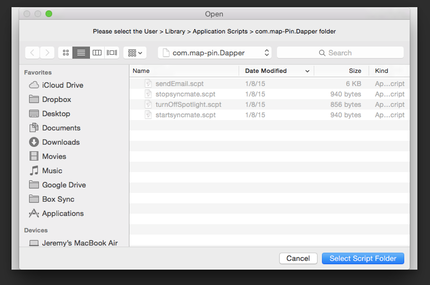
Next, the Wizard asks you for access to a scripts folder for Dapper to place it’s scripts into. These scripts do several things for you, including the ability to email you (or your mobie device) when a sync has comleted - really handy for the first, long, sync:
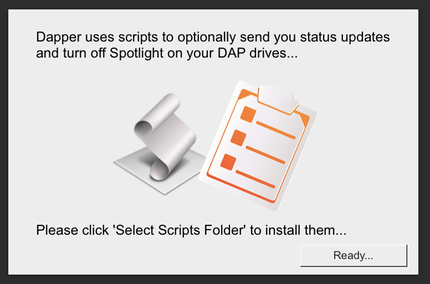
You will want to simply click the “Select Script Folder"
Next, after you have completed looking at the setup Wizard, you will see the Dapper main screen:
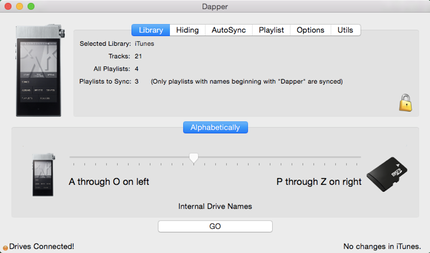
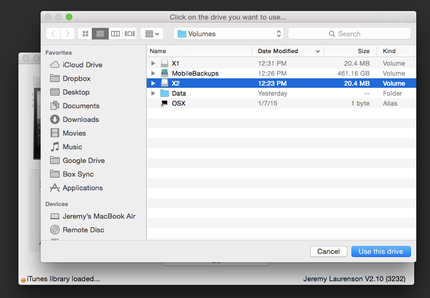
On this screen, you need to click the left card (highlighted below) and then from the selector that pops up, select the first (or internal) disk drive from your Digital Audio player.
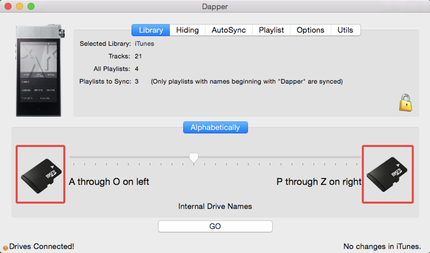
This step actually tells OSX that your app is allowed to access those disk drives as a security requirement of OSX :
If your DAP only has one drive, select it on the left. If your has more than one drive, add the second drive on the right hand side.
